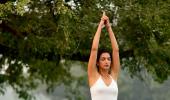
Divya Rolla lists asanas to begin your yoga journey.
Over the last 10 years, yoga has gotten a lot of publicity so much we even have a day in the year dedicated to celebrating the amazing benefits practising yoga brings to all our lives.
In my last 15 years of practising yoga, I have realised the hardest part about developing a yoga practice is simply the discipline of getting on to your mat every day.
It is not the amount of time, or the number of hours, or even the ability of the body to do crazy postures. It is simply developing the discipline of showing up. Of being consistent.
Here are 7 simple asanas we can all do from the comfort our homes to help energise both our bodies and minds.
Can we all truly set aside 15 minutes to begin with and start a simple practice?
Please note: If you have never practised yoga before, please learn and do the below mentioned poses under the guidance of a good teacher before attempting the same on your own.
1. Virabhadrasana 2 (Warrior Pose 2)

How to do it
- Stand in Mountain Pose.
- Exhale and spread your legs around three to four feet wide.
- Place your hands on your waistline.
- Move your right toe in an angle of 90-degrees and the left one at an angle of 15-degrees.
- Turn your neck towards your right and fix your gaze ahead.
- Inhale deeply and extend your hands in each direction palms facing the ground.
- Raise your arms to your shoulder level keeping them parallel to the ground.
- Breathe out deeply and bend your right knee. Keep it perpendicular to the floor.
- Hold the pose for 30-60 seconds while keeping your pelvis inwards and back straight. Keep breathing deeply.
- Exhale and straighten your extended knee.
- Bring your hands back to the waist.
- Straighten your toes and return to the starting position.
- Repeat warrior two on the other side.
Benefits
- Strengthens your shoulders, arms, legs, ankles and back.
- Opens your hips, chest, and lungs.
- Improves focus, balance, and stability.
Contra-indications
- Leg, knee, hip, or shoulder injuries
- Diarrhoea
- Weak heart or weak constitution
- High blood pressure
2. Utthita Parsvakonasana (Extended side angle pose)

How to do it
- Stand tall in Mountain Pose.
- Take a long step with your right foot in the same direction.
- Slowly turn your right foot out at an angle of 90-degrees. Turn your left foot out in the same direction at an angle of 45-degrees.
- Exhale and bend your right knee at an angle of 90-degrees so that it is parallel to the ground. Bend your trunk downwards.
- Hold the pose for a couple of seconds and breathe deeply here.
- Exhale deeply and bend your body over your right leg as you stretch sideways.
- Lower your right hand and place it on the inside or outside of the right foot.
- Raise your left hand over the head and parallel to the ear.
- You should feel an intense stretch right from the hand to the heel.
- Tilt your neck slowly upwards towards the ceiling.
- Hold this final pose for 20-30 seconds.
- To release the pose, press down your feet, lower your left arm, bring back your thigh, and straighten your torso.
- Repeat the extended side angle pose on the other side.
Benefits
- Improves flexibility.
- Strengthens legs and core.
- Improves digestion.
- Stretches the groin, chest, and shoulders.
Contra-indications
- Headache.
- High or low blood pressure.
- Neck pain or injury.
3. Kali Asana (Goddess Pose)

How to do it
- Stand with your legs 3 feet apart.
- Raise your arms upwards with palms facing each other.
- Turn the feet out 45 degrees facing the corners of the room, and as you exhale bend the knees over the toes squatting down.
Benefits
- Revitalises the spine and enhances mental clarity.
- Improves flexibility.
- Strengthens legs and core/
Contra-indications
- Those recovering from shoulders, rib cage, hips, pelvis, knees, ankles and toes injuries should avoid the practice of Goddess Pose.
4. Urdhva Mukha Svanasana (Upward facing dog)

How to do it
- Lie down on your belly with your toes facing downwards. Your feet should be hip-width apart and your hands should rest beside your lower ribs.
- Now, activate your quadriceps by pressing down all toes into the ground.
- Press down with your hands and feet and take a deep breath.
- As you inhale, straighten your arms and lift your legs off the ground.
- Your arms should be at a 90-degree angle with the floor and your feet should be anchored.
- Draw your chest upwards by pressing your palms on the floor. Roll your shoulders back.
- Keep bending your back till your hands are completely straight.
- Close your eyes and also raise your chin upwards.
- Hold for 5 breaths, then release.
Benefits
- Opens the chest and strengthens the whole body.
- Up dog aligns the spine and invigorates the kidneys and nervous system.
- It also stimulates the abdominal organs and stretches your chest, lungs, shoulders, and abdomen.
Contra-indications
- Recent or chronic injury to the back, hips, arms or shoulders.
- Pregnancy.
- Recent abdominal surgery.
5. Halasana (Plough Pose)

How to do it
- Lie on your back with your arms beside you and palms downwards.
- Inhale and slowly lift your feet off the floor using your abdominal muscles.
- Let your legs reach an angle of 90-degrees.
- Continue to breathe gently and support your hips and back with your hands and lift them off the floor.
- In a gentle sweep, take your legs over your head till your toes touch the floor behind your head.
- Make sure that your back is perpendicular to the floor. Though this might be a difficult pose to do at first, it generally gets better after a few attempts.
- Hold this position for 30 seconds-1 minute and feel your body relax as you feel every breath.
- Slowly come back to the starting position.
- If you are just starting with halasana, you should do it once and then increase the reps. People who are experienced with this posture can practice this 3-5 times.
Benefits
- Halasana stretches your spine and stretches, strengthens, and tones your back muscles.
- It helps prevent and relieve tightness in your neck, shoulders, and back.
- The pose also strengthens your shoulders, arms, and legs.
- Practising halasana enhances flexibility, which improves muscle and joint mobility
Contra-indications
- Those suffering from back problems or slipped disc.
- Weak or injured cervical muscles.
- Weak legs, weak hamstring muscles or calf muscles.
- Pregnant women or women during their menstruation time should avoid halasana.
6. Parivrtta Sukhasana (Seated Twist)

How to do it
- Sit on the floor in a cross-legged position.
- Place your right hand on the floor behind you and your left hand in front of your right knee.
- Exhale and gently twist your body to the right and look over your right shoulder.
- Hole the pose while you inhale and exhale.
- Repeat on the other side.
Benefits
- It increases flexibility throughout the spine, shoulders, and chest.
- It also helps to reduce stress and anxiety.
- Twisting stimulates and tones your abdominal organs, including the kidneys and digestive organs.
Contra-indications
Students with injury related to the hips, neck, shoulders, spine, lower back, knees, pelvic floor muscles, or any abdominal injury should take it slow and practice under the guidance of a yoga teacher.
7. Padmasana (Lotus Pose)

How to do it
- Sit on the floor with your legs stretched in front of you and the heels touching the floor. Place the hands by your sides while keeping the spine erect.
- Slowly move your legs a little wider while keeping the heels on the ground.
- Bend one of your knees and place it on the opposite thigh by using the hands to get the feet towards you. Ensure that the sole of your feet is pointed upwards and the heel as close as possible to the abdomen.
- Do the same on the other leg so that both the legs are locked in a criss-cross. Make sure to keep the spine erect and the head straight.
- Take deep breaths and stay in this pose for 2 to 3 minutes.
Benefits
- Improves digestion. This is because Padmasana yoga provides the abdominal portion of the body with a gentle massage, thereby boosting digestion.
- Helps relax the mind and alleviates stress.
- Eases childbirth.
- Helps reduce menstrual pain and cramps.
Contra-indications
Avoid doing this asana if there is any form of knee injury, injury in the ankle or calf or if you are suffering from any back or spine discomfort. Also avoid if you are suffering from sciatica infections or weakness in the sciatic nerves.
Divya Rolla is the yoga and meditation lead at Cult.fit, a health tech start-up.

Disclaimer: All content and media herein is written and published online for informational purposes only. It is not a substitute for professional medical advice. It should not be relied on as your only source for advice.
Please always seek the guidance of your doctor or a qualified health professional with any questions you may have regarding your health or a medical condition. Do not ever disregard the advice of a medical professional, or delay in seeking it because of something you have read herein.
If you believe you may have a medical or mental health emergency, please call your doctor, go to the nearest hospital, or call emergency services or emergency helplines immediately. If you choose to rely on any information provided herein, you do so solely at your own risk.
Opinions expressed herein cannot necessarily provide advice to fit the exact specifics of the issues of the person requesting advice.


 © 2025