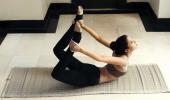
Ira Trivedi, wellness expert and founder of Yog Love, explains how these postures and breathing techniques will help you keep common monsoon ailments at bay.
The rainy season is synonymous with the meteoric rise in the cases of cold, cough, flu, infections and other diseases.
This coupled with water-borne and vector-borne diseases like malaria, dengue, and chikungunya put our immunity to test.
To make matters worse, the symptoms of COVID-19 are somewhat similar to common cold and flu.
Therefore, it becomes highly important to adopt healthy food habits, follow a healthy lifestyle, have sound sleep and stay physically fit and active.
The best way forward is to enhance the functioning of our immune system.
If you can spend a few minutes practising pranayama, yoga asanas and meditation, you'll be able to boost your immunity.
Regular yoga keeps allergies and infections away that tends to affect our lungs, respiratory and immune system while improving strength, agility, digestion, relaxation, and awareness.
The best part with yoga is it can be practised in any weather from the comfort of your home.
Here are 10 asanas and pranayama that will help you stay fit and healthy in the monsoon.
1. Kapalabhati Pranayama

Kapalabhati is a breathing technique that has a profound effect on the whole body.
In Sanskrit, Kapalabhati means shining skull.
This kriya is great for cleansing the lungs.
It pushes all the stale air out allowing you to oxygenate your body quickly and efficiently.
It massages the internal organs and has a detoxifying effect on the body while improving the metabolism rate, digestive tract functioning, and helping reducing weight effectively.
How to do it
- Sit up straight in a comfortable, relaxed posture.
- Resting both hands on the knees, bring together the thumb and forefinger in gyan mudra.
- Close your eyes and take a few deep breaths.
- Inhale deeply (only when you begin) and contracting the abdominal muscles, exhale through both nostrils, forcing the air out.
- Inhalation should take place passively by automatic relaxation of the abdominal muscles. It should be spontaneous recoil, involving no active effort.
- After completing 20 rapid breaths stop and resume normal breathing pace. This is one complete round.
2. Nadi Shodhan Pranayama

This breathing technique is also known as Anulom Vilom pranayama.
We must understand that Nadis are an important part of the whole system.
These are subtle energy channels in our body and it can get blocked due to multiple reasons.
This breathing technique clears the blocked energy channels which further helps in calming and relaxing our mind.
Nadi Shodhan pranayama helps in preparing our mind to enter the meditative state.
Practising it for just a few minutes in the rainy season helps keep the mind calm, happy and peaceful. It releases accumulated tension and fatigue.
How to do it
- Sit relaxed with your spine erect.
- Place your left hand on your left knee with palms open.
- Place your middle and index finger between your eyebrows. Keep your thumb on the right side of the nostril, little finger and ring finger on the left nostril.
- Press your right nostril with the thumb and exhale through the left nostril.
- Now press your left nostril gently with the little and index finger and exhale from the right nostril.
- Breathe in from the right and exhale from the left nostril. Alternate and repeat 10-15 times. Relax.
3. Adho Mukha Svanasana (Downward Facing Dog Pose)

This pose helps in energising and rejuvenating the body.
It strengthens the spine, chest muscles thus increasing your lung capacity.
It strengthens your arms, shoulders, legs, and feet.
It is also instrumental in increasing the blood circulation to the brain.
How to do it
- Come on your hands and your knees. Keep your knees directly below your hips and hands a little in front of the shoulders.
- Lift your knees from the ground, making the legs straight and pushing your hips upwards and back. Keep your arms straight with palms flat on the ground. Your head should be between the arms.
- Your body should form an upside-down V shape.
- Breathe deeply and hold this pose for a few moments before relaxing.
4. Setu Bandhasana (Bridge pose)

This asana is practised by bending the back and forming a shape like a bridge.
It helps in strengthening the back muscles, core, and glute and thus prevents back pain.
Further, it energises the kidneys, calms our nervous system, and maintains the blood pressure in the body. Bridge pose stretches the neck, chest, spine and expands your lungs.
How to do it
- Lie down on your back.
- Keep your feet flat on the ground while lifting your torso by bending your knees.
- Palms should stay flat on the ground, underneath the hips and head and neck should also remain on the ground.
- Hold this position for a few seconds and relax.
5. Bhujangasana (Cobra pose)

This posture burns abdominal fat and improves your digestion.
It tones the abdomen muscles, improves blood circulation, strengthens the entire back and improves the flexibility of your spine.
It plays a great role in relieving stress and fatigue.
How to do it
- Lie flat on the stomach with hands on either side of the chest next to the shoulders.
- Inhale and lifting the chest, bring the chin up towards the sky.
- Stay here and breathe, inhaling and exhaling deeply to open the chest.
- Exhale, and lower the chest back to the ground.
6. Naukasana (Boat Pose)

Naukasana primarily helps in strengthening the abdominal muscles. It helps to regulate blood sugar levels.
The biggest advantage of this asana is its effectiveness in burning belly fat if practised regularly.
It also reduces stress thus improving your mental health.
How to do it
- Lie down on your back.
- Inhale deeply and exhale. Slowly lift your chest and legs off the ground.
- Keep your arms stretched forward and point your fingers towards your feet. Your body will resemble the shape of a boat.
- Hold for 5 to 10 seconds and return to normal position.
7. Shalabasana (Locust Pose)

It helps to increase flexibility and strength of the entire back muscles.
It strengthens shoulders, arms and tones the nerves and muscles especially in the neck and shoulders.
It also helps in improving digestion by massaging the abdominal organs.
How to do it
- Lie face down on your stomach with arms on either side of the body.
- Slide the left and right hand under the left and right hip respectively for traction.
- Inhale and lift both legs pointing your feet towards the ceiling as high as possible.
- Keeping your hips firmly on the ground, inhale and exhale for as long as you are comfortable.
- Exhale and lower your legs slowly.
- Relax.
- If you cannot lift both legs at once, try lifting one leg at a time. Begin with right, followed by left. Then alternate and repeat.
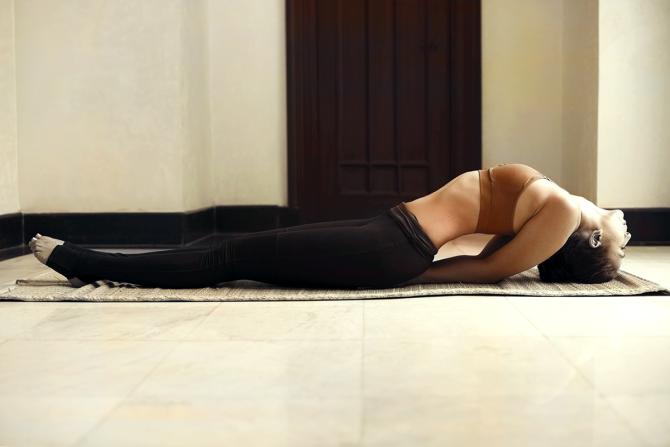
8. Matsyasana (Fish pose)
 <>
<>
It is a perfect asana for flexibility and gaining muscle strength.
It helps in building strong abs and thighs, improves blood circulation, and keeps the spine flexible.
It is highly beneficial for posture improvement by preventing the body from hunching forward and relieving stress through appropriate breathing and better respiration.
How to do it
- Lying on the back, bring the arms underneath the body.
- Inhale, raise the chest up and place the crown of the head on the ground.
- Using the arms and elbows for balance stay here and breathe.
9. Janu Shirsasana (Head to Knee Pose)

This is a full forward fold asana that stretches the whole body.
It has a wonderful effect on our abdominal organs and muscles through massaging.
It helps in maintaining blood pressure levels by reducing body weight besides soothing our minds and filling us with inner peace.
How to do it
- Sit on the floor with your right leg extended forward.
- Bend your left knee out to your side. Make sure your left foot is pressing into your right inner thigh.
- Inhale deeply and raise your arms above.
- Bend at your hips as you exhale, folding forward towards your right leg.
- Hold your outstretched right foot with your hands, stretching forwards.
- Hold this pose for a few seconds and then relax.
- Repeat with left leg.
10. Sarvangasana (Shoulder stand)
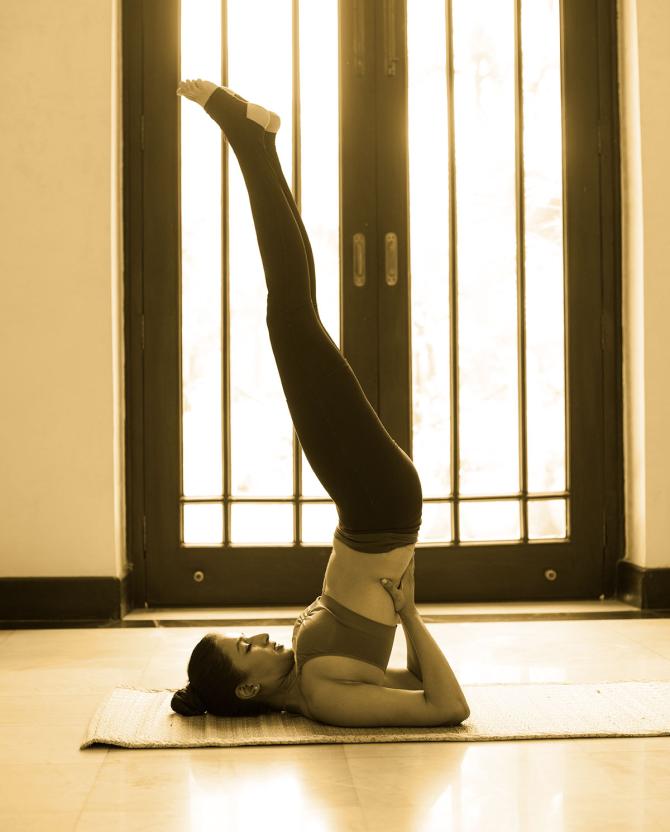
The shoulder stand is a part of the Padma Sadhana (lotus meditation) yoga sequence.
It is a pose where our whole body is balanced on the shoulders.
It greatly influences the functioning of all parts of your body, helps in maintaining mental and physical health and is therefore referred to as the ‘queen of asanas’.
How to do it
- Lie flat on your back with the legs and feet together and place the arms and hands on either side of the body with the palms facing down.
- Raise both your legs and move the legs over the head.
- Push down on your arms, raising the hips up and taking the legs further back.
- In the final position, the weight of your body rests on the shoulders, neck, and elbows.
- Gaze up towards your toes.
- Stay here and breathe.
As you embrace and enjoy the monsoon season to the fullest, don’t forget to take all the steps required to boost your immunity levels.
Apart from yoga, drink a lot of water, sleep well and don’t forget to include vitamin C in your diet.

Disclaimer: All content and media herein is written and published online for informational purposes only. It is not a substitute for professional medical advice. It should not be relied on as your only source for advice.
Please always seek the guidance of your doctor or a qualified health professional with any questions you may have regarding your health or a medical condition. Do not ever disregard the advice of a medical professional, or delay in seeking it because of something you have read herein.
If you believe you may have a medical or mental health emergency, please call your doctor, go to the nearest hospital, or call emergency services or emergency helplines immediately. If you choose to rely on any information provided herein, you do so solely at your own risk.
Opinions expressed herein cannot necessarily provide advice to fit the exact specifics of the issues of the person requesting advice.

